How to Set Up a Printer on Windows 10 Enterprise: A Step-by-Step Guide
In this article, we will guide you through the process of setting up a printer on Windows 10 Enterprise, a feature-rich operating system designed for businesses and organizations. With the print server, you can share printers on a local network, control access to the printers, and manage the print queue.
A print server is a fundamental feature in Windows 10 that allows you to manage the printing of documents efficiently and securely. With the print server, you can share printers on a local network, control access to the printers, and manage the print queue. This is particularly useful in enterprise environments where multiple users need to access shared printers.
The first step in setting up a printer on Windows 10 Enterprise is to connect the printer to the network. This can be done by connecting the printer to a USB port on the Windows 10 device or by connecting the printer to the network using an Ethernet cable.
If you are connecting the printer to a USB port, Windows 10 will automatically detect the printer and install the necessary drivers. However, if you are connecting the printer to the network, you will need to install the printer drivers and configure the print server settings.
Alternatively, you can install the printer drivers using the "Print Management" console. To access the "Print Management" console, go to the Start menu, type "Print Management," and click on the "Print Management" icon. This will launch the "Print Management" console, where you can install the printer drivers and configure the print server settings.
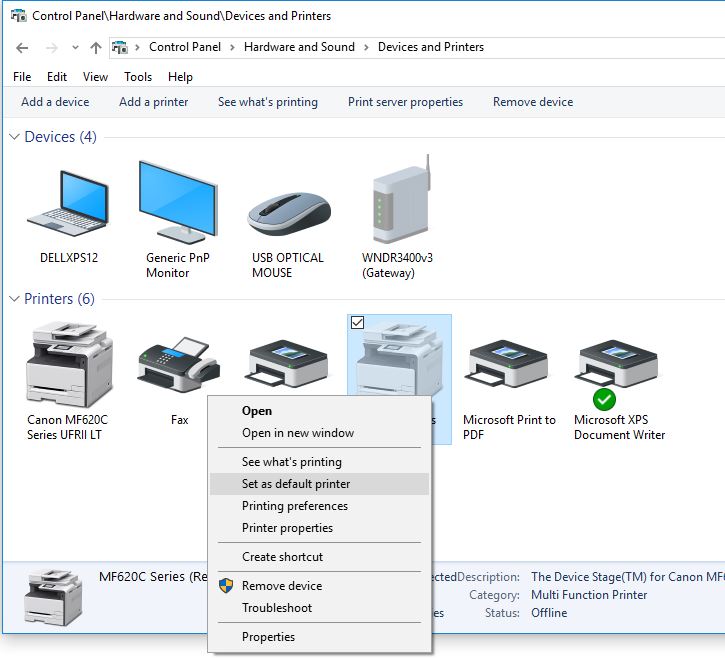
Moving forward, it's essential to keep these visual contexts in mind when discussing How To Set Up Printer On Windows 10 Enterprise.
Once the printer drivers are installed, you will need to configure the print server settings. To do this, go to the Start menu, type "Print Management," and click on the "Print Management" icon. This will launch the "Print Management" console, where you can configure the print server settings.
Once the printer is set up and configured, you can share it with other users on the network. To do this, go to the Start menu, type "Print Management," and click on the "Print Management" icon. This will launch the "Print Management" console, where you can share the printer with other users.
Conclusion
Setting up a printer on Windows 10 Enterprise is a relatively straightforward process that involves connecting the printer to the network, installing printer drivers, configuring print server settings, and sharing the printer with other users. By following these steps, you can ensure that your printers are set up and configured correctly and that users on your network can access them easily.
Common Printer Problems in Windows 10 and Their Solutions

Despite the best efforts of the printer manufacturers, printers can sometimes run into problems when used with Windows operating systems. Some common printer problems in Windows 10 include "printer not found," "print jobs stuck in the queue," "printer spooler crashes," and more.
Printer Not Found
Another common printer problem in Windows 10 is "print jobs stuck in the queue." This can occur due to a variety of reasons, including printer jams, low paper levels, or incorrect printer settings. To resolve this issue, you can try the following steps:
Another common printer problem in Windows 10 is "printer spooler crashes." This can occur due to a variety of reasons, including outdated drivers, incorrect printer settings, or printer conflicts. To resolve this issue, you can try the following steps:
- Update the printer drivers to the latest version.
- Check the printer settings and ensure that they are correct.
- Check the printer for any conflicts with other devices.
- Restart the printer and the Windows 10 device.


")


